There are two ways to edit in Photoshop: destructively and non-destructively. You can erase pixels, deleting them forever, which is destructive editing; or you can make them temporarily invisible (using masks) with the option of making them visible again later, which is non-destructive editing—it's like magic.
Masking = Non-destructive
Masking lets you selectively hide and show pixels without destroying
anything you might want back later.
Erasing = Destructive
Using the eraser tool results in the annihilation, and total obliteration of pixels. Dramatic, I know but seriously—they’re gone forever!

LAYER MASK
Black is subtractive, White is additive. Painting on your layer mask with
black hides pixels, painting with white makes hidden pixels visible.
Step 1
Add layer mask
Select the layer you want to edit and click on the layer mask icon in the bottom of the layers panel. This will attach a linked layer mask thumbnail to your original layer thumbnail.

Step 2
Paint on mask
Click inside the layer mask thumbnail and look at your swatches: they should be black and white. Select black as your foreground color, make sure your mask thumbnail is selected, and paint on your artboard.
Painting on your layer mask with black will hide the pixels you're painting over. Now switch to white and paint over the same area. It's magic!
Important safety tips:
If you're painting on your mask layer with a shade of gray, the masking will be transparent.
Make sure you're painting on the layer mask and not on the actual layer. The way you can tell, is that the active layer will have brackets around its thumbnail.
CLIPPING MASK
Clipping masks require a base layer with content. Whatever is on the clipping
mask layer will be restricted to the content on the base layer.
Step 1
Make base layer
To create your base layer, create a blank layer and fill it with a shape.
I used the brush tool to make this
blue blob.
The base layer can be any color, you're not limited to black and white like with the layer mask.
Step 2
Organize layers
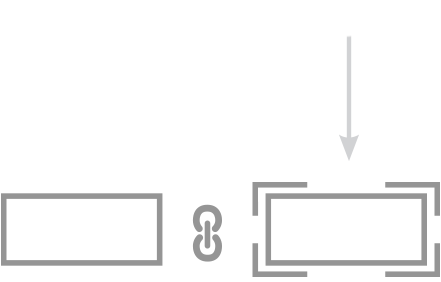
Order your layers so that the layer you want to clip is on top of the layer you want to clip to. In this case I'm going to clip the blue blob to my lettering.
Step 3
Clip
With the top layer selected, right-click the layer and select 'create clipping mask' from the menu. To unclip the layer, right-click it again and select 'release clipping mask.'


Masking video tutorial:
